
【SANGO】目次のデザインをよりお洒落にするカスタマイズ方法
完成イメージ
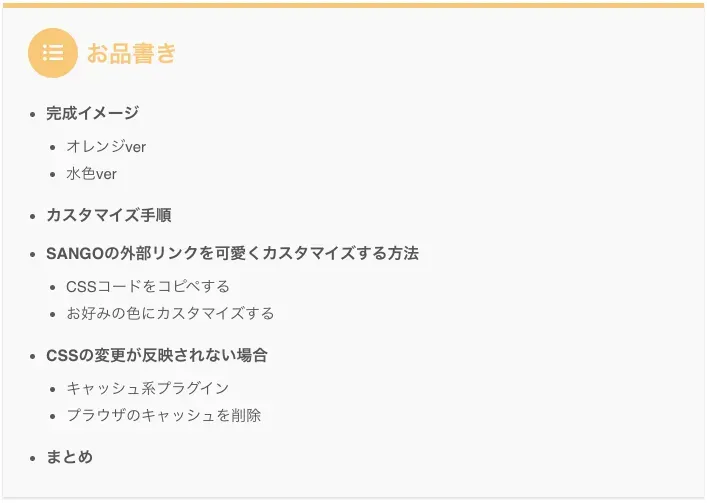
Before
After
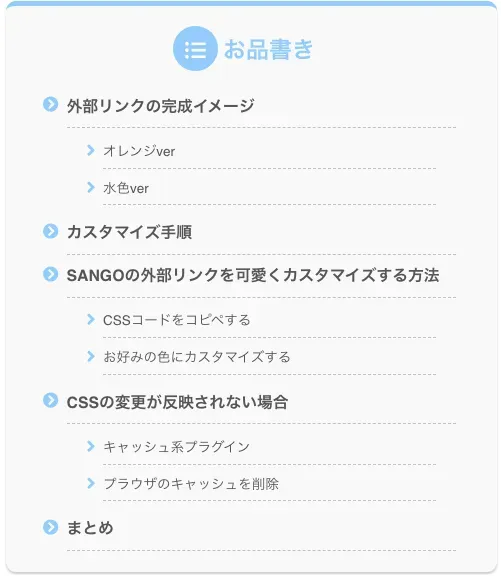
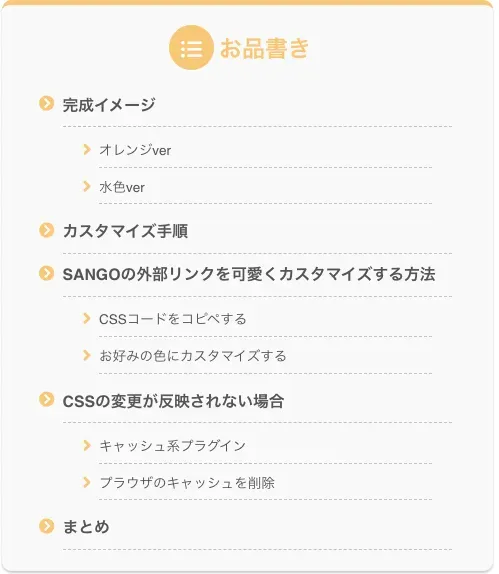
ライトブルーとオレンジの2色をサンプルとして作りました。
- 圧迫した印象を与えないよう、幅を狭くしてスタイリッシュに
- 各見出し前にアイコンをつけて可愛く
- 区切り線をつけて見やすいように
※ 本記事のカスタマイズは「Table of Contents Plus」の目次専用になります。別の目次プラグインを利用している場合は反映されないのでご注意ください。
カスタマイズ方法
0. バックアップを忘れずに
早速カスタマイズしていきたいところですが、万が一の事態に備えて事前にバックアップを取っておくことをおすすめします。
その方法について詳しくは下記記事にまとめているでぜひ参考にしてください。
![]() WordPressでCSSのバックアップをとる方法【カスタマイズ時に必須】
WordPressでCSSのバックアップをとる方法【カスタマイズ時に必須】
1. CSSを追記
ライトブルー
#toc_container {  width: 87% !important;  margin: 0 auto;  border: 0;  border-top: 5px solid !important;  border-top-color: #92ccfb !important; /* 上のボーダーの色 */  border-radius: 10px;  box-shadow: 0 2px 2px rgb(0 0 0 / 20%) !important; /* 表の影 */}@media screen and (min-width: 600px) {  #toc_container {    width: 70% !important;  }}
.toc_title {  display: block !important;  padding: 0 !important;  margin-right: 15px !important;  color: #92ccfb !important; /* タイトルの色 */  text-align: center;}
.toc_title::before {  position: relative !important;  width: 45px !important;  height: 45px !important;  margin-right: 5px;  font-size: 0.9em !important;  background-color: #92ccfb !important; /* タイトルのアイコンの背景色 */}
.toc_list a {  position: relative;  display: block;  padding-bottom: 0.5em;  font-weight: 700;  line-height: 2;  color: #333; /* 文字色 */  border-bottom: dashed 1px silver;}
.toc_list li {  position: relative;  padding: 0.3em 1em 0.1em 1.1em !important;  font-weight: 700;  line-height: 1.5;  list-style: none !important;}
.toc_list > li > a {  padding-bottom: 0.3em;}
.toc_list li::before {  position: absolute;  top: 0.4em;  left: -0.4em !important;  font-family: "Font Awesome 5 Free" !important;  font-weight: 900;  color: #92ccfb; /* アイコンの色 */  content: "\f138";}
.toc_list li ul a {  padding-top: 0;  padding-bottom: 0.2em;  font-size: 0.9em;  font-weight: 400 !important;}
.toc_list li ul li::before {  top: 0.2em;  left: 0 !important;  font-size: 1.2em;  content: "\f105";}
オレンジ
#toc_container {  width: 87% !important;  margin: 0 auto;  border: 0;  border-top: 5px solid !important;  border-top-color: #f8c678 !important; /* 上のボーダーの色 */  border-radius: 10px;  box-shadow: 0 2px 2px rgb(0 0 0 / 20%) !important; /* 表の影 */}@media screen and (min-width: 600px) {  #toc_container {    width: 70% !important;  }}
.toc_title {  display: block !important;  padding: 0 !important;  margin-right: 15px !important;  color: #f8c678 !important; /* タイトルの色 */  text-align: center;}
.toc_title::before {  position: relative !important;  width: 45px !important;  height: 45px !important;  margin-right: 5px;  font-size: 0.9em !important;  background-color: #f8c678 !important; /* タイトルのアイコンの背景色 */}
.toc_list a {  position: relative;  display: block;  padding-bottom: 0.5em;  font-weight: 700;  line-height: 2;  color: #333; /* 文字色 */  border-bottom: dashed 1px silver;}
.toc_list li {  position: relative;  padding: 0.3em 1em 0.1em 1.1em !important;  font-weight: 700;  line-height: 1.5;  list-style: none !important;}
.toc_list > li > a {  padding-bottom: 0.3em;}
.toc_list li::before {  position: absolute;  top: 0.4em;  left: -0.4em !important;  font-family: "Font Awesome 5 Free" !important;  font-weight: 900;  color: #f8c678; /* アイコンの色 */  content: "\f138";}
.toc_list li ul a {  padding-top: 0;  padding-bottom: 0.2em;  font-size: 0.9em;  font-weight: 400 !important;}
.toc_list li ul li::before {  top: 0.2em;  left: 0 !important;  font-size: 1.2em;  content: "\f105";}
上記コードを、テーマで読み込んでいるCSSファイルにコピペします。
CSSを編集する方法について、詳しくは下記記事にまとめているでぜひ参考にしてください。
![]() 【初心者向け】WordPressでCSSを編集・追加する方法
【初心者向け】WordPressでCSSを編集・追加する方法
![]() 【WordPress】CSSの変更が反映されない場合の原因・対処法
【WordPress】CSSの変更が反映されない場合の原因・対処法
もし任意の色を適用したい場合は、コピペしたCSSの/* 〇〇色 */とコメントしている箇所をお好みの色にしてください。
以上でカスタマイズは完了です 🎉
他のSANGOカスタマイズも全て下記記事にまとめているので、ぜひ参考にしてください。