
【Cocoon】コピペでOK!タイムラインを可愛くカスタマイズする方法
完成イメージ
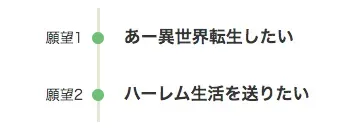
Before
After
パターン1
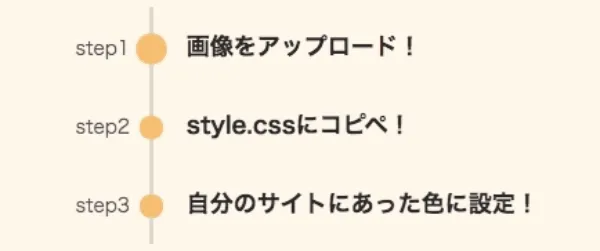
デフォルトのデザインのものに忠実に、円を大きくしてより見やすくしたものです。
上の「step1」のところの円を見てもらうと分かるように、1つ目の円はポワンポワン動くようになっていて、さりげない可愛さと見やすさを両立しています。
パターン2
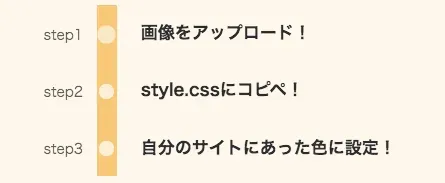
左側の棒を太くし、Googleマップの乗り換え案内のような感じにしてみました。
カスタマイズ方法
0. バックアップを忘れずに
早速カスタマイズしていきたいところですが、万が一の事態に備えて事前にバックアップを取っておくことをおすすめします。
その方法について詳しくは下記記事にまとめているでぜひ参考にしてください。
![]() WordPressでCSSのバックアップをとる方法【カスタマイズ時に必須】
WordPressでCSSのバックアップをとる方法【カスタマイズ時に必須】
1. CSSを追記
パターン1
.timeline-item::before {  top: 22px;  left: 103px;  width: 17px;  height: 17px;  background: #f8c678; /* 任意の色に */}
.timeline-item-content {  border-left: 3px rgb(25 25 25 / 12%) solid;}
.timeline-box {  border: initial;}
.timeline-item-label {  color: rgb(25 25 25 / 70%);}@media screen and (max-width: 480px) {  .timeline-item-content {    border-left: initial;  }
  .timeline > li.timeline-item {    border-left: 3px rgb(25 25 25 / 12%) solid;  }
  .timeline-item::before {    left: -10px;  }}
/* 以下はアニメーションをつけたい場合 */.timeline li:nth-child(1)::before {  opacity: 0.5;  animation: timeline-circle 1.5s infinite;}@keyframes timeline-circle {  100% {    opacity: 1;    transform: scale(1.3, 1.3);  }}
パターン2
.timeline-item::before {  top: 22px;  left: 112px;  width: 15px;  height: 15px;  background-color: rgb(255 255 255 / 70%);}
.timeline-item-content {  border-left: 20px #f8c678 solid; /* 任意の色に */}@media screen and (max-width: 480px) {  .timeline > li.timeline-item {    border-left: 20px #f8c678 solid; /* 任意の色に */  }
  .timeline-item-content {    border-left: initial;  }
  .timeline-item::before {    top: 57px;    left: -17.5px;  }}
上記コードを、テーマで読み込んでいるCSSファイルにコピペします。
CSSを編集する方法について、詳しくは下記記事にまとめているでぜひ参考にしてください。
![]() 【初心者向け】WordPressでCSSを編集・追加する方法
【初心者向け】WordPressでCSSを編集・追加する方法
![]() 【WordPress】CSSの変更が反映されない場合の原因・対処法
【WordPress】CSSの変更が反映されない場合の原因・対処法
もし任意の色を適用したい場合は、コピペしたCSSの/* 任意の色に */とコメントしている箇所をお好みの色にしてください。
以上でカスタマイズは完了です 🎉
他のCocoonカスタマイズも全て下記記事にまとめているので、ぜひ参考にしてください。
![]() Cocoonのおしゃれなカスタマイズ全集【初心者もコピペで簡単】
Cocoonのおしゃれなカスタマイズ全集【初心者もコピペで簡単】